Winterizing Your Equipment: A Comprehensive Guide for Contractors and DIY-ers

As the temperatures drop and the winter season approaches, it's time for contractors and DIY enthusiasts to prepare their equipment for the challenges of colder weather. Properly winterizing your tools and machinery is essential to ensure they remain in top working condition, prevent costly repairs, and keep your projects on track. In this comprehensive guide, we'll walk you through the steps to effectively winterize your equipment, whether you're a professional contractor or a dedicated DIY-er.
1. Cleaning and Inspection:
The first step is to thoroughly clean your equipment. Remove dirt, grime, and any debris that may have accumulated during your projects. A clean surface allows for a more thorough inspection. Check for loose bolts, nuts, and any visible signs of wear or damage.
2. Lubrication:
Proper lubrication is key to preventing rust and maintaining moving parts. Lubricate all exposed moving components with the appropriate oils or greases. Pay special attention to areas such as hinges, pivot points, and cables.
3. Fuel Stabilization:
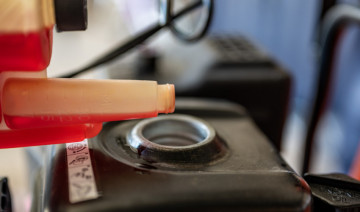
Treat the fuel in your equipment with a fuel stabilizer to prevent it from breaking down during storage. Run the equipment for a few minutes after adding the stabilizer to ensure it circulates throughout the fuel system.
4. Battery Care:
Cold weather can be tough on batteries. Remove the battery from your equipment, store it in a cool, dry place, and periodically recharge it to maintain its charge. Consider using a trickle charger for long-term storage.
5. Fluid Maintenance:
Ensure all fluid levels are at the recommended levels. In particularly cold regions, consider using winter-grade fluids designed to withstand lower temperatures without thickening or freezing.
6. Air Filter Inspection:
Inspect and, if necessary, replace air filters. A clean air filter is crucial for efficient engine performance, especially during the winter when engines may have to work harder.
7. Tire Maintenance:
Check and adjust tire pressure. Cold weather can cause tire pressure to drop, affecting the stability and maneuverability of your equipment. Properly inflated tires ensure better traction and prevent damage.
8. Exterior Protection:
For equipment stored outdoors, use covers or tarps to shield against the elements. Protecting your tools from snow, rain, and ice can significantly extend their lifespan.
9. Tool Attachments:
If your equipment has attachments or accessories, ensure they are in good condition. Grease moving parts, inspect for wear and tear, and make any necessary repairs or replacements.
10. Storage Considerations:
Choose a dry and sheltered location for storing your equipment during the winter months. Avoid leaving equipment directly on the ground to prevent moisture damage. Use blocks or pallets for elevation.
11. Regular Checkups:
Periodically check stored equipment throughout the winter. Run engines briefly to circulate fluids and keep components in working order. This also provides an opportunity to address any unforeseen issues promptly.
12. Documentation:
Keep a record of the winterization process for each piece of equipment. Note the date of winterization, repairs made, and any specific requirements for each tool.
Winterizing your equipment is an investment in the longevity and efficiency of your tools. Whether you're a professional contractor or a dedicated DIY-er, taking the time to properly prepare your equipment for the winter ensures that your tools are ready for action when spring arrives. By following these comprehensive steps, you can confidently store your equipment during the winter months, knowing that they will be in top-notch condition for your future projects. Stay prepared, stay warm, and keep your tools in excellent working order throughout the winter season!

Comments